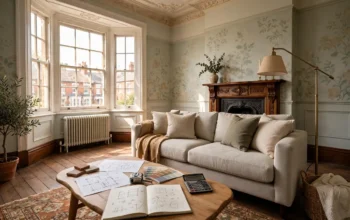
A buyer scrolling Rightmove or Zoopla gives each listing a few seconds. The first photograph does most of the work: it decides whether the buyer taps through to the rest or keeps scrolling. A room that looks good in person can still photograph badly, and a photograph that looks bad is rarely forgiven, because the buyer has a hundred other listings to look at and no reason to give yours a second chance.
Most of the damage is done by staging mistakes, not by the camera. The room was never quite ready, the light was never quite right, or something small in the frame pulled the eye to the wrong place. The good news is that every mistake below is cheap to fix, and most of them take minutes. This guide covers the mistakes that show up again and again in UK listing photos, the fix for each one, and a photo-day checklist you can run through in half an hour.
For the full room-by-room method, including kerb appeal, depersonalising and a staging timeline before listing, read our guide to how to stage a house to sell in the UK. This page is the companion to it: it deals only with what goes wrong in the photographs.
Mistake 1: Shooting Before the Room Is Ready
The most common mistake is also the most avoidable: the photographer arrives, or the agent takes the photos on a phone, before the house is actually ready. Dishes sit in the sink, the bed is unmade, the washing is draped over a chair, the bins are in shot, and the worktop is crowded with things that live there every day but have no place in a photograph.
A photograph freezes all of it. In person, a visitor’s eye moves on; in a photograph, the eye stops on the mess because there is nothing else to move to. Dirty dishes in a listing photo tell a buyer exactly how the house has been cared for, and an unmade bed makes a bedroom look like a room nobody sleeps in properly, rather than a room waiting for its next owner.
The fix is a reset, not a deep clean. Clear every worktop, table and surface to a single item or nothing at all. Make every bed with straight, matching bedding. Empty the sinks, hide the washing, take the bins outside, and put the dish rack away. Walk through each room with the eyes of a buyer who has never seen the house, and remove anything that would make them stop and wonder about the household rather than the room. If a professional stager or cleaner is doing the work, the cost of a one-off reset is small compared with a relisting; our guide to home staging cost in the UK sets out what DIY and professional staging typically involve.
Mistake 2: Leaving Personal Items in Shot
Family photographs on the wall, children’s drawings on the fridge, toothbrushes and medicines in the bathroom, a pile of post on the hall table, pet beds, litter trays and food bowls. Every one of these tells the buyer about the people who live in the house, and that is exactly what a listing photograph should not do.
A buyer needs to picture their own life in the rooms. Personal items block that. A wall of family faces makes the buyer feel like a guest in someone else’s home rather than a future owner of their own. A bathroom crowded with toiletries reads as a bathroom with no storage, even when the storage is there behind the clutter. Pet items are worse still, because they raise questions about smells and damage that the photograph cannot answer.
The fix is to depersonalise for the photographs, not for ever. Pack the family photographs, the fridge art, the personal ornaments and the pet items into a box for photo day, and put them back afterwards if you are staying in the house while it is on the market. Clear bathroom surfaces completely, with towels folded straight and matching. Put the post, the keys, the coats and the school bags out of sight. The room should look lived in enough to feel warm, but empty enough that a buyer can imagine their own furniture in it.
Mistake 3: Dark Rooms and Closed Curtains
Natural light is the single most flattering thing a room has, and a dark photograph reads as a small room, a damp room, or a room with something to hide. The usual causes are simple: curtains drawn, blinds closed, lamps switched off, and windows that have not been washed in months.
A dim room with the lamps off is a wasted room. The camera will either darken the whole image or blow out the window while the room itself goes black, and either way the buyer sees a room they cannot judge. Dirty glass quietly dulls every bit of light coming in, and a buyer notices the dullness even when they cannot say why.
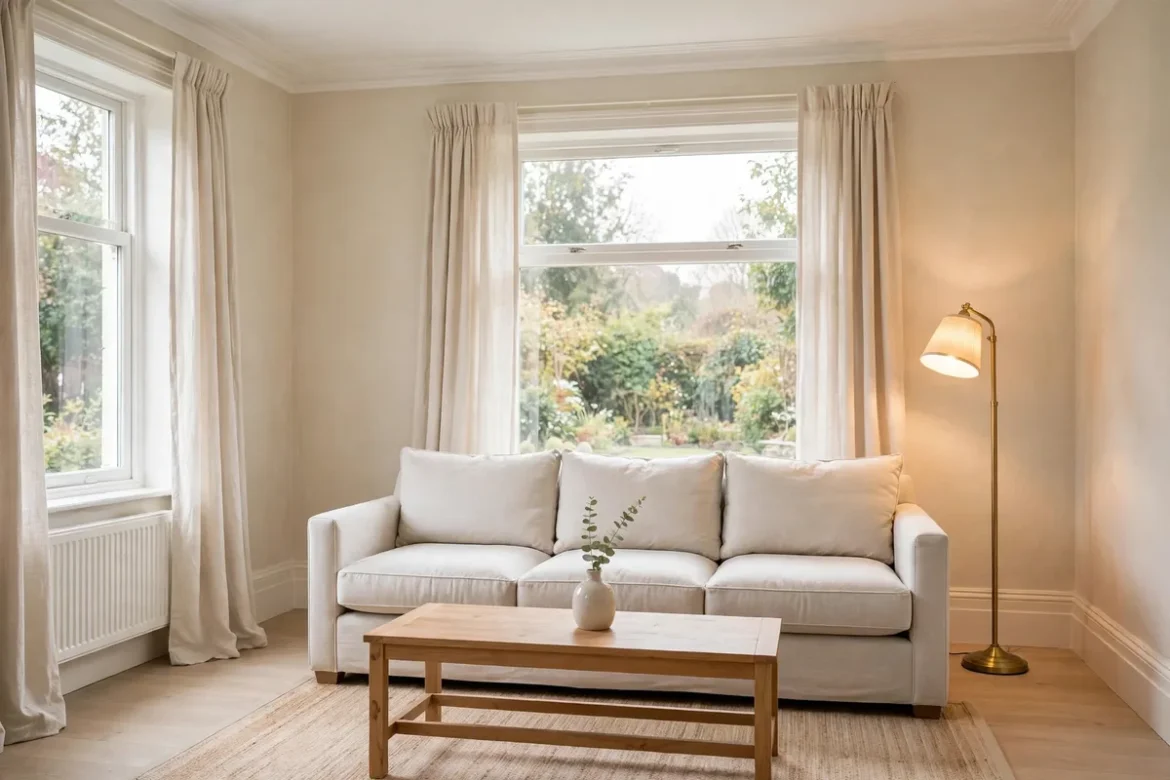
The fix is to shoot bright and in the middle of the day. Open every blind, pull the curtains fully back, wash the windows inside and out, and switch on every lamp. Overhead light alone is not enough: a room photographed with only a ceiling light looks flat and shadowy, while layered light, a ceiling fitting plus a floor lamp and a table lamp, gives the camera something to work with. Our guide to layered lighting design for a living room explains the three layers and how to set them up without rewiring anything. North-facing rooms need this most of all, because their light is already cool and soft, and a closed curtain can turn a pleasant room into a grey one.
One exception: do not shoot a room at dusk unless the lighting is deliberate and the photograph is labelled as an evening shot. A dusk photograph with poor light looks like a mistake, not a mood.
Mistake 4: Furniture That Fights the Camera
Some rooms photograph badly because of where the furniture sits, not because of what is in the room. The classic errors are all about scale and position. Every piece pushed flat against the walls, which leaves a dead gap in the middle and makes the room feel like a waiting room. A sofa that is too large for the wall it sits on, which makes the room look smaller than it is. A rug that is too small, marooned under the coffee table with all the furniture floating off its edges on bare floor, which makes the whole room feel cheap and disconnected. And a television as the first thing the eye meets, a giant black rectangle that turns a living room into a screen with a sofa attached.
The fix is to pull the furniture in and anchor it. Float the sofa a little away from the wall, angle the chairs towards each other, and put at least the front legs of the seating on the rug so the grouping reads as one arrangement. If the rug is too small, either use a larger one for the photographs or remove it entirely: a room with no rug photographs better than a room with a rug that is plainly the wrong size. Turn the television off and angle the photograph so the room is the story, not the screen. Tuck cables and cords behind furniture, because a tangle of cords snaking down from a television is the fastest way to make a styled room look unstyled.
For the measurements that decide what actually fits, including 60cm walkways and viewing distances of 1.8m to 2.4m, read our guide to small living room layout ideas for UK terraced houses. The same numbers that make a room work in person are the ones that make it photograph well.
Mistake 5: Colour Casts and Clashing Palettes
A room can be tidy, bright and well arranged and still photograph badly because of colour. The usual causes are light sources that disagree with each other: a warm orange lamp beside cool daylight from the window, a ceiling bulb with a different colour temperature from the table lamps, or a bold feature wall that the camera turns into a shout.
Mixed bulb temperatures are the quietest version of this mistake. One lamp glows orange, another glows white, and the photograph ends up with two different whites in the same frame. The buyer’s eye reads that as something wrong with the room, even when the room itself feels fine. Strong colours have the opposite problem: a deep red or bright yellow wall that looks confident in person can dominate a photograph so completely that the buyer remembers the wall and nothing else.
The fix is to match the light and calm the palette for the photographs. Use bulbs of the same colour temperature in every fitting in a room, warm white throughout, and replace any bulb that is a different temperature. Keep the palette neutral for photo day: if a feature wall is very strong, consider photographing the room from an angle that softens it, or repainting it in a warm neutral if the house will be photographed more than once. A cream or pale grey throw over a brightly patterned sofa does the same job for furniture, and it costs nothing. The goal is a photograph in which the room is the subject, not a single colour.
Mistake 6: The Photographer in the Mirror
Some mistakes are the camera’s, not the room’s, and the most famous is the photographer reflected in a mirror, a window or a glass cabinet door. A buyer should be looking at the bedroom; instead they are wondering who is standing in the doorway. Other camera errors are less funny but just as damaging: tilted verticals, where door frames and walls lean, which makes a room look badly built; an extreme wide-angle lens that stretches the room until it looks twice its size, which a buyer will feel as a lie when they visit; and the toilet lid left up, which is the one thing a buyer’s eye goes straight to in a bathroom photograph, for all the wrong reasons.
The fix is to check the frame before the shutter is pressed. Use a tripod with a timer, or shoot from an angle that keeps the photographer out of every mirror and reflective surface. Keep the camera level so vertical lines stay vertical. Avoid the widest angle setting: a modest wide angle shows the room honestly, while an extreme one distorts it and sets up a disappointed viewing. In every bathroom, close the toilet lid, straighten the towels, and take the photograph from the doorway rather than from inside the room, so the buyer sees the suite rather than the plumbing.
If the agent is taking the photographs, say this out loud before they start. Agents photograph dozens of houses a week, and a seller who asks for level shots, no reflections and lids down will get better photographs than a seller who says nothing.
Mistake 7: Over-Editing and Virtual Staging That Misleads
A little editing is normal: straightening, brightening and correcting colour are part of preparing a listing. The mistake is editing that changes what the house actually is. Removing a damp patch, widening a room, adding a window that does not exist, or furnishing an empty room with furniture that was never there, and presenting the result as the real house, is not staging. It is misleading the buyer.
This has become a real problem with AI tools that can furnish an empty room or change a photograph in seconds. The BBC reported cases in 2026 where AI-enhanced listing photographs showed warm lighting and luxurious decor in rooms that looked nothing like that in person, and where a doll’s house was removed and the shape of a rug changed in a child’s bedroom before the listing went live. Trading Standards told the BBC that estate agents can use AI for basic enhancements, or to virtually furnish an empty room, as long as they indicate that they have used the technology. One large portal has said AI-generated imagery is permitted provided it is clearly labelled, and that agents remain responsible for what they upload.
The fix is honesty, and it costs nothing. Keep edits to light, colour and straightening, and never remove a permanent feature, a damp patch, a power line or a neighbouring building from a photograph. If a room is virtually staged, label the image clearly as virtually staged and include the unstaged photographs as well, so buyers can see the real room. If an image has been AI-enhanced beyond a basic tidy-up, say so. Buyers forgive a labelled virtual furnishing; they resent furniture they discovered was never there, and a buyer who travels two hours to view a house that looks nothing like its listing has lost a day and will negotiate harder or leave.
Mistake 8: The Wrong First Photo and a Muddled Order
The first photograph is the listing’s front door, and sellers often choose it badly. A photograph of the hallway, the bathroom or the back of the house tells the buyer nothing, while the strongest room, usually a bright living room or the front of the house on a clear day, sits third or fourth in the set. A muddled order is nearly as bad: kitchen, then a bedroom, then the garden, then another bedroom, with no logic a buyer can follow.
The fix is to lead with the strongest image and then follow the order a buyer would walk through the house: front exterior, hallway, living room, kitchen, bedrooms, bathroom, garden. Keep the order logical and label any digitally staged image so the buyer knows what they are looking at. If the agent controls the upload, which is usual in the UK, say which photograph you want first and in what order the rest should run. It is your house and your listing, and the order is worth a conversation.
The Photo-Day Checklist
Run through this list room by room, about half an hour before the photographer arrives. It is the whole guide in one page.
Living room: curtains fully open, windows washed, every lamp on, cushions plumped and straight, coffee table clear except for one item, rug flat, television off, cords hidden, sofa pulled slightly off the wall.
Kitchen: worktops clear, sink empty, dish rack put away, kettle and toaster the only small appliances left out, fridge front clear of magnets and notes, bins outside, floor swept.
Bedrooms: beds made with straight matching bedding, bedside tables clear except for a lamp and one item, wardrobes closed, clothes put away, curtains open, mirrors checked for reflections.
Bathroom: toilet lid down, surfaces completely clear, towels folded straight and matching, shower screen cleaned, bath mat straight, no toiletries in shot.
Hallway and stairs: coats and shoes put away, post and keys hidden, mirror clean, runner straight, front door area tidy for the exterior shot.
Whole house: all bulbs the same warm white, all blinds open, heating on if it is cold so the house feels warm, pets out of the house or in one closed room, personal photographs and pet items packed away, and one last walk-through with a phone camera to catch anything the eye missed. Photographing each room on your own phone first is the best test there is: if it looks wrong on a phone, it will look wrong on Rightmove.
What to Fix First If You Only Have One Evening
If the photographer is coming tomorrow and you have one evening, spend it in this order.
First, declutter the surfaces. Clear worktops, tables, bathroom shelves and bedside tables. This one change does more for photographs than anything else, and it costs nothing.
Second, fix the light. Wash the windows, open the curtains, and switch on every lamp. A bright photograph forgives a plain room; a dark photograph condemns a good one.
Third, depersonalise. Pack away family photographs, pet items, toiletries and the pile of post. The buyer needs to see their life in the rooms, not yours.
Fourth, fix the furniture positions. Pull the sofa off the wall, put the front legs on the rug, and turn the television off. If the rug is too small, take it up for the photographs.
Fifth, check the frame. Walk through with your phone, look for mirrors, tilted lines, the toilet lid and anything the camera will see that you have stopped noticing. Then, and only then, think about editing. A well-staged room needs almost no editing at all, and that is the point: the best listing photographs are the ones where the room did the work, not the software.
Frequently Asked Questions
Should I hire a professional photographer for listing photos?
If the house is a higher-value property, or the photographs are the main way buyers will find it, yes. A professional with a tripod, level shots and proper lighting will get more from the same rooms than a phone will. But a professional cannot fix a room that was never staged: the checklist above matters more than the camera. For most ordinary UK homes, a careful agent with a good camera and a staged house produces photographs that are good enough, provided the seller asks for level shots, no reflections and a sensible photo order.
Can I use virtual staging in my listing photos?
Yes, provided it is labelled clearly and the unstaged photographs are included as well. Virtual staging is genuinely useful for empty rooms, because it helps buyers judge scale and picture a lived-in space. It becomes a problem only when it changes the room itself, adds features that do not exist, or is presented as the real house. Keep the original photographs, label the staged ones, and ask your agent what Rightmove and their own policy require.
What time of day is best for listing photographs?
Midday, when the light is brightest and most even. Morning light can be lovely in an east-facing room and afternoon light in a west-facing one, but a whole-house shoot needs consistent light, and midday gives it. Avoid dusk unless the photograph is a deliberate evening shot and is labelled as one.
How much should I spend fixing my home before photographs?
For most sellers, nothing beyond time and a few small items: matching towels, a larger rug if the current one is too small, bulbs of one colour temperature, and window cleaner. Professional staging is a bigger decision, and whether it is worth it depends on the property type and the local market. Our guide to home staging cost in the UK sets out DIY and professional costs so you can decide before you spend.
Do listing photos really matter that much?
They are the first thing a buyer sees, and usually the only thing they see before deciding whether to look further. A buyer scrolling a portal compares your photographs with dozens of others, and the photographs decide which houses get a viewing. Staging the rooms properly before the photographs are taken is the cheapest improvement a seller can make to a listing, because it costs an evening of work and it shows in every single photograph.
What is the single worst staging mistake in a listing photo?
A dark, cluttered room. Clutter tells the buyer the house is not cared for, and darkness tells them the room is small or hiding something. Together they are the two fastest ways to lose a buyer, and together they are also the two easiest to fix: clear the surfaces and open the curtains.