A dripping tap wastes water, adds to your bill, and can worsen if left too long. The good news is that it is one of the more manageable DIY plumbing jobs, provided you diagnose the cause correctly before taking anything apart.
How Do You Fix a Dripping Tap?
To fix a dripping tap, turn off the water supply, dismantle the tap to find the worn part, then replace the washer, O-ring, or cartridge depending on the type of tap you have. Traditional taps with cross or knob handles usually need a new washer, while modern lever taps with a quarter or half-turn action usually need a new ceramic disc cartridge.
What You Will Need
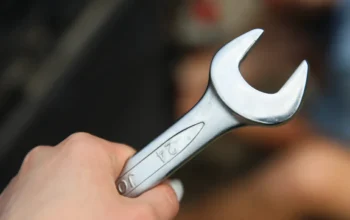
- Adjustable spanner or pipe wrench
- Screwdrivers, including a flathead and Allen key if your tap uses one
- Replacement washer, O-ring, or cartridge, matched to your specific tap
- A cloth or towel to catch residual water
- A plug for the sink, to stop small parts falling down the drain
How to Fix a Dripping Tap: Step by Step
1. Diagnose Before You Dismantle
Check where the drip is actually coming from. Water dripping from the spout usually points to a worn washer or cartridge, while water leaking around the handle or base usually points to a worn O-ring. Replacing the wrong part will not fix the problem, so it is worth taking a moment to confirm the source first.
2. Turn Off the Water Supply
Locate the isolation valve under the sink, or the main stopcock if there is no isolation valve, and turn off the water. Open the tap fully and let any remaining water drain out before you start.
3. Plug the Sink and Lay Out Your Tools
Put the plug in to stop any small screws or parts falling down the drain. Lay each piece out in the order you remove it, so reassembly is straightforward.
4. Remove the Handle
Find the small screw holding the tap together, often hidden under the hot or cold indicator cap. Loosen it with a screwdriver or Allen key, then lift the handle away.
5. Access the Worn Part
With the handle off, use an adjustable spanner to loosen the retaining nut and expose the washer or cartridge. For traditional taps, check the small washer at the base of the stem for wear. For lever taps, you will see the ceramic disc cartridge instead.
6. Replace the Washer, O-Ring, or Cartridge
Fit the new part, matching the size and type exactly to the one removed. For a leak at the base of the spout rather than the handle, the O-ring is the more likely culprit and can usually be replaced without removing the full valve.
7. Reassemble the Tap
Put the tap back together in the reverse order you took it apart, tightening the retaining nut and handle screw firmly but without overtightening.
8. Turn the Water Back On and Test
Turn the water supply back on slowly and check for leaks around the base and handle. Run the tap on and off a few times to confirm the drip has stopped.
When to Call a Plumber Instead
If the isolation valve is seized, the pipework moves when you try to work on it, the tap is an unfamiliar or high-end brand, or the leak is anywhere near electrics, it is safer to call a plumber. A standard call-out typically costs between £80 and £150 outside emergency hours, and clearing the area under the sink beforehand can help keep the visit shorter and cheaper.
If a dripping tap is part of a wider bathroom refresh, our small bathroom ideas on a budget covers other low-cost fixture updates worth doing at the same time. If the sink itself is slow to drain, our guide to unblocking a drain covers that separately.
Frequently Asked Questions
Why does my tap keep dripping after I replaced the washer?
If dripping continues, the O-ring or the valve seat itself may also be worn, or the replacement washer may not be the correct size. Some modern taps use a cartridge rather than a washer, so fitting a washer to the wrong tap type will not fix the leak.
How much does it cost to call a plumber for a dripping tap?
A standard call-out for a dripping tap typically costs between £80 and £150, depending on your location and the time of day, with emergency or out-of-hours call-outs usually costing more.
Do I need to turn off the whole house’s water supply to fix a tap?
No, usually not. Most taps have a dedicated isolation valve under the sink that lets you shut off supply to just that tap. If there is no isolation valve, you will need to use the main stopcock instead.
Is a dripping tap actually worth fixing quickly?
Yes. Beyond the wasted water and added cost, a persistent drip can contribute to limescale build-up, staining, and in some cases damp or mould around the fitting if left unaddressed for a long time.
Can I fix a leaking mixer tap the same way as a single tap?
The general process is similar, but mixer taps with a single lever usually use a ceramic disc cartridge rather than a traditional washer, so the replacement part and some of the disassembly steps differ from a standard two-handle tap.
If you are ever unsure about isolating the water supply safely, or the fault is not where you expect it to be, stop and call a qualified plumber rather than risk further damage.
About the Author
Spire Homes Editorial Team researches and writes practical, UK focused home improvement guides covering renovation planning, financing, interior design, and property maintenance. Our content is reviewed for accuracy and updated as guidance changes.