Tips on Installing Hardwood Floors Yourself
In this article, we will go through step-by-step instructions on how to install the hardwood floors that you want, which will make that room just right. We will give you tips in the appropriate spots, which will help with your installation.
The first step you need to take is to pick out the type of wood that you want your floor to have. Pre-finished boards will not only save you time, but they are an easy shortcut that you can take. If you go for the pre-finished board that will save you the time of having to finish the entire floor after the installation, and it saves you the money that you would have spent on that equipment. It also saves you the time and effort you would have to put in when finishing the wood yourself.
Now, to prepare for the hardwood floor, you need to do several things. The first thing you have to do is get your current flooring off, whether it is carpeting or even soft flooring. You would have to start in the corner and work your way towards the middle. There are different ways in which you can get the flooring up from that corner by using a pair of pliers, a pry bar, or even floor cutters.
Remove the Tack Bar
The next thing that you will have to do is to remove the tack bar that goes around the room. You should also go around and pick up any staples or any other items that could be lifted off the floor from the previous floor’s installation. If your carpet was glued down to the floor, you can purchase a glue-dissolving solvent that you can then use on your floor. Make sure that you read the instructions before you use the product.
You would then sweep the floor and make sure that there is nothing wrong with the floor of the room. The next thing that you will have to do is install oriented strand board, OSB, on your subfloor. This layer in your flooring is also known as the wafer board. This is less expensive to use than if you were to use plywood. A staple gun may be used when you are attaching the OSB to your subflooring.
Sheets of Red Rosin paper
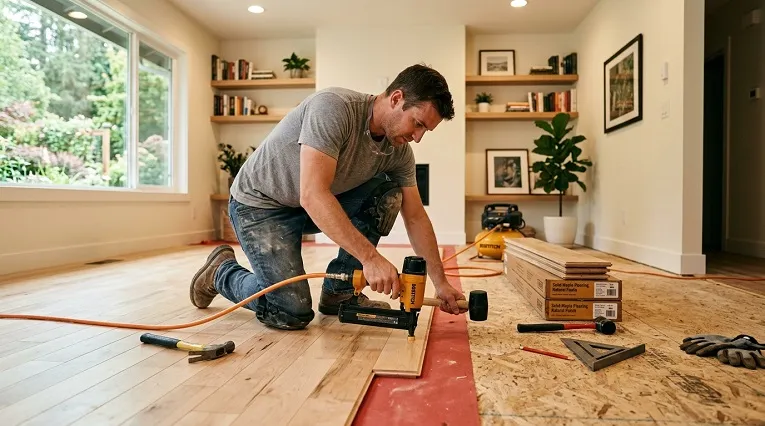
You should then lay down sheets of red rosin paper. This should be used all over the floor to cover the OSB. Now we are ready to get to the point of installing the hardwood floor. In this step, you will have to use a pencil or some chalk to mark where the joists are located. The Joists are the beams that support the floor.
You should now measure about three-eighths of an inch out from the baseboard, and you should make a line to keep that measurement. Your hardwood could possibly expand in the warm weather and contract in the cold, so it is necessary to keep a little bit of extra room for that to happen.
The wall that is the longest and straightest is your starting point. Place one end of the board that you are using right up to the line that you have drawn on the floor, showing you how far from the baseboard that you should go. One thing that you have to make sure of is that the floor board is perpendicular to the joist in the floor. Now you should nail that board down to the subfloor and the joist. This has to be done with a nail and a hammer due to the fact that an automatic stapler will not reach down all the way to the joist.
Use of a pneumatic stapler
You then continue to put all the boards down, making sure that you are fitting the tongue and the groove ends together. Use a Pneumatic stapler when you are stapling into the subfloor. You continue to do this until you have a finished, and perfect-looking hardwood floor. If you have used the pre-finished wood, then your work is over. If not, then you will have to learn how to do the finishing and perform it yourself to make your wood look the best that it can look.
So you know the basics of installing a hardwood floor yourself. So go out there and make that room look really great with a hardwood floor that you installed yourself!